Showing posts with label DIY. Show all posts

Monday, February 10, 2020

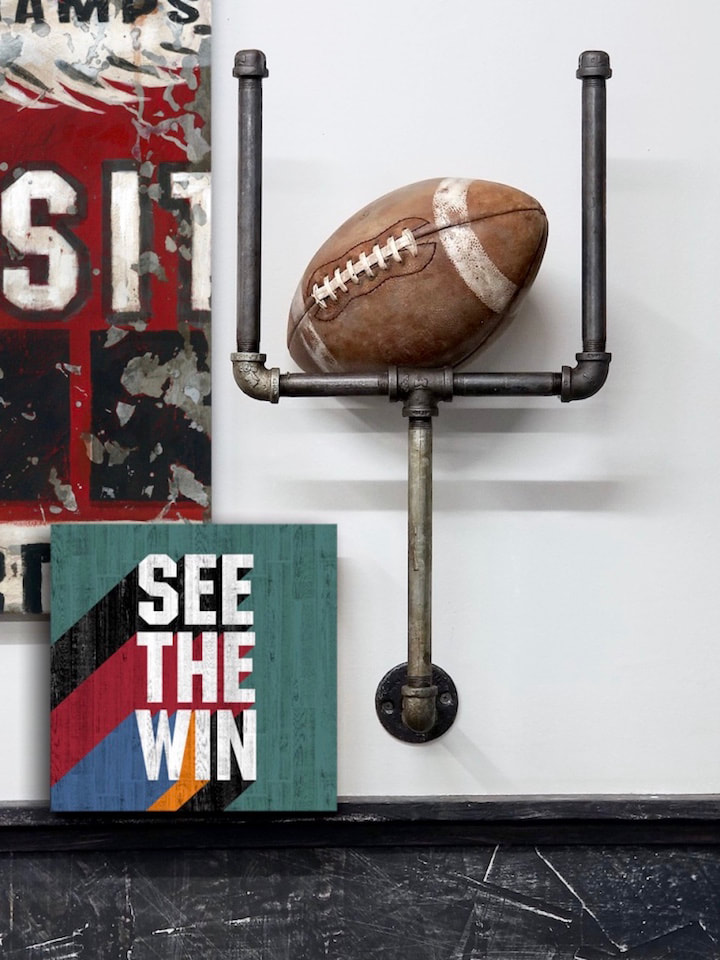
DIY - BLACK PIPE FOOTBALL GOALPOST

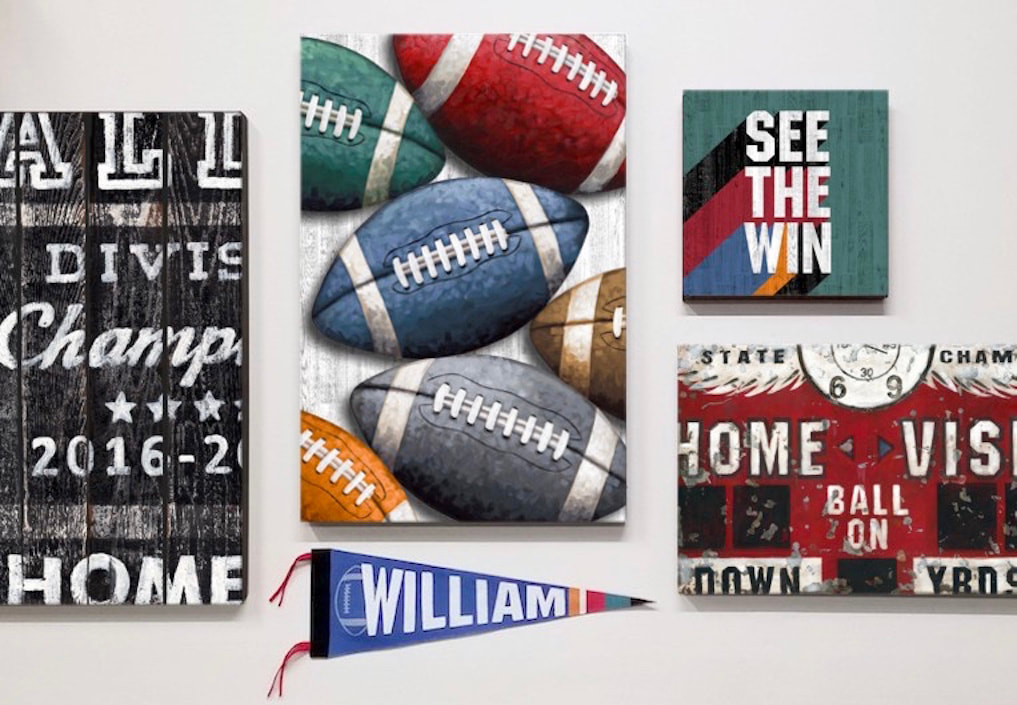
As part of my new wall art and decor collection entitled Blitz, I thought I'd include a do-it-yourself tutorial and shopping list for my pipe goal post. 
Picture
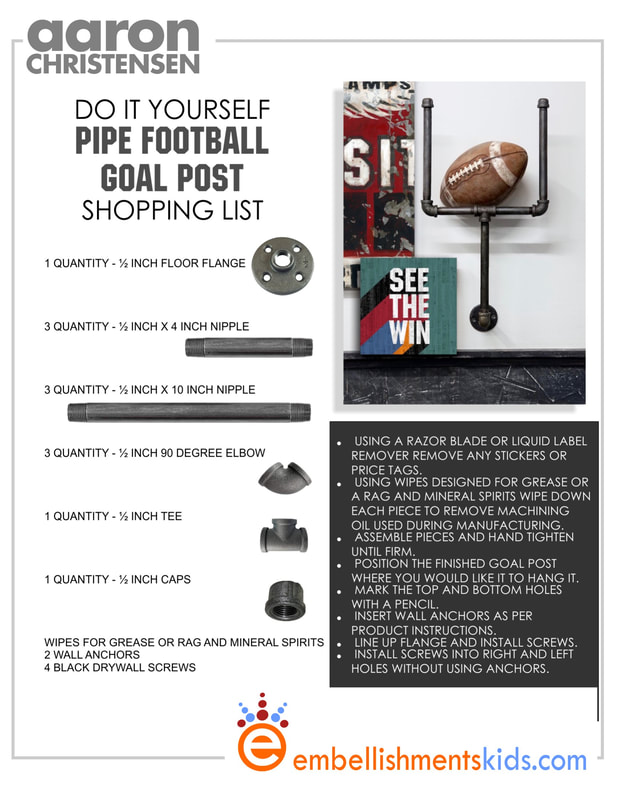
Print yourself off a shopping list and head to the hardware store.  While I show it in black pipe, you can also hunt down galvanized and copper plated, if you prefer a different look.  Download below.
Or print out a copy of the image below:
Decor DIY - Football Goal Post Made From Black Pipe by Aaron Christensen
DIY Pipe Football Goal Post

Football Decor and Wall Art Collection - Blitz by Aaron Christensen


source https://www.embellishmentsstudio.com/blog/diy-black-pipe-football-goalpost

Wednesday, June 28, 2017

DIY Craft - Create a Fun Cactus Garden Using Pool Noodles and Kick boards.

I'm sharing a DIY on how to make 3 dimensional fun cacti over on my studio journal.  It's surprisingly easy and uses readily available materials.

Make a cactus DIY Do it Yourself Cacti by Aaron Christensen
Cactus making DIY by Aaron Christensen

I'd love to see what you come up with.  If you share your cacti on social media tag me @aaronchristensenart.
Enjoy!- Aaron


Create a cactus craft DIY by Aaron Christensen Embellishments Studio
DIY on crafting your own Cactus.

Saturday, December 1, 2012

Rainbow-Tastic Holiday Blog Hop


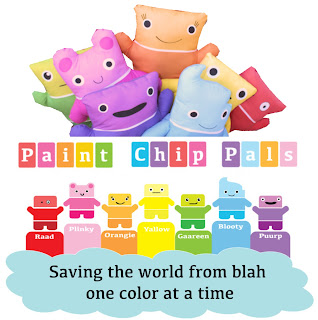
Shake, shake, shake....shake your Blooty!  That song has been stuck in my head ever since I was introduced to the Paint Chip Pals.  Blooty is the little blue guy with the pompadour.  He's one of seven characters created by the fun and fab team of Andrea and Cliff Currie from HandMakeMyDay.com.

Andrea, aka Ms.Craft-tastic is the glitter wielding champ alumni of TLC's Craft Wars, hosted by Tori Spelling.  Cliff, her marital cohort in craft is the self proclaimed meat head that puts stuff together.   In a wonder twins super power moment they gave birth (figuratively not literally...thank goodness) to seven little color ambassadors that they are hoping to share with the world.


They've launched a Kickstarter campaign to crowd fund their new endeavor.  As part of the campaign a bunch of other creatives and myself have been asked to create something inspired by the Paint Chip Pals in the Rainbow-Tastic Holiday Blog Hop.

So, while singing Shake my Blooty, in my off pitch glass cracking way, I crafted a little DIY that's perfect for kid's rooms, craft rooms or as a gift for that special teacher.  It's a monogram made out of crayons.  What paint chip pal wouldn't love that?

Click for Instructions
I've included the Paint Chip Pals and instructions to this Crayon Craft in an extended post about the trend of Super Color and the epidemic of color coma that comes with it.   Jump to it and enjoy.

If you love the power of hand made and support the entrepreneurial spirit, please consider pledging to the Curries Kickstarter campaign and watch your greens turn into a rainbow of colors.

If you'd like a chance to win one of the Paint Chip Pals, drop me a comment below to be entered to win.  Who's your favorite Paint Chip Pal?  What's your favorite trend color?  I'm shaking my Blooty...what song comes to mind for your favorite?

Visit the Rainbow-Tastic Blog Hop hub for more color inspired musings by Margot Potter, Twinkie Chan, Alexa Westerfield and more....

Color Coma, the Magic of Color and the Power of Green

You've seen them, I know you have.  Those folks standing in the home improvement store, staring at the wall-o-color wonder, the paint chip display.  They are suffering from what I call chasing rainbows, it's a debilitating sickness of epidemic proportions.  These unsuspecting and ambitious homeowners storm the paint department confident in their plans.  "I'm going to paint my room an x,y,z color...yep I am.  I just need to find the right shade."  They arrive at the paint chip color display and like some kind of hypnotic funhouse whirlygig the sheer amount of color options begins to undermine their confidence and send them into a trance.  Wobbly kneed and glossy eyed, they start grabbing random colors...."hmmm, this fuchsia is nice, wait how about bright yellow...oops can't leave out teal, teal is purdy....that's purdy...p u r d y  c o l o r s . . . l o o k   a t   a l l     d   a         p  u   r    d     y          c      o     l     o      r      s".  The poor victims have drops of sweat and a little drool forming as their color coma takes over.

I bring this up because abundant color is all the rage for home decor and fashion!  Every color is the new black.  So while the rainbow spectrum is hot I encourage you to explore.  But, to prevent a big box mental mush meltdown, I want to introduce you to three ways to improve your color swagger and confidence.


1) PAINT CHIP PALS

 You need a color buddy who will love you regardless of any color mishap or confusion.  My friend Andrea Currie and her hubs Cliff are working to introduce the world to their full spectrum Paint Chip Pals.

Paint Chip Pals Color Card Dolls Andrea Currie

Andrea is a powerful force in the crafting community, you may have caught her champion worthy glitterness on TLC's Craft Wars, hosted by Tori Spelling.  She wields glitter like a sparkly ninja.

She and Cliff's characters, based upon paint color cards, are in development as plush dolls and colorful accessories.  You can help Pinky, Gaareen and all their friends paint our world and prevent color coma by visiting the Currie's Kickstarter campaign.  Your support can earn you Paint Chip Pal swag of your very own.  My favorite is  Blooty.

  
 Send some Kickstart-ing funds their way and watch your greens turn into a rainbow of color.  Head over to my Rainbow-tastic Blog Hop post for more info and a chance to win a Paint Chip Pal.

2)  SKIP THE PAINT GO STRAIGHT TO THE DECOR

Avoid choosing paint as a way to bring color into your home and decorate with color instead.   If you have neutral colored walls and want to add more color pizazz then consider furniture, accessories and decor as your palette for rainbow nirvana.

Here I've created a mood board to illustrate how colorful a craft room for you and the family can be with some fun and whimsical hues.  The magic of mixing and matching multiple colors will help you avoid the doldrums of a simple color palette and allow you to explore your inner color cravings.  You've heard practice makes perfect, right?  If you want to play with your own mood boards and decorate your color needful room virtually, there are a ton of great collaging sites to do so, such as Olioboard.com and Sampleboard.com.  

Craft Room Colorful Mood Board Decor Ideas Aaron Christensen 

Let's play a game of eye spy.  Within this colorful craft room mood board, you'll not only find some Paint Chip Pals, you will find my latest wall art introductions of "Love Knows No Color", "Fill Your Heart With Rainbows" and "Color Outside the Lines".  All of which are available as canvas reproductions from my site and a network of 1500 boutiques nationwide.  They're my vaccination for the colorless lifestyle.

color and art inspired wall art aaron christensen


You will also spy a quick an easy DIY project which is my third cure for the color coma.  Craft your way into remission!

3) INTRODUCE COLOR THROUGH CRAFT

Create your very own Crayon Monogram Alphabet Letter.  You'll feel safe and sound playing with your childhood faves the crayon.  Arrange and rearrange them to explore your favorite combinations.  And maybe they'll inspire some paint colors.

crayon monogram diy craft

This easy to assemble craft can personalize your art space, child's room or is a perfect gift for a beloved teacher.  All you need is some foam core or thin wood panel, crayons, a sharp knife and some hot glue.


Excuse me sir....maam, can I help you with something or bring you a tissue, you're drooling.  Welcome back from your chasing rainbows fever.  I hope my poppy, coral, greeny so you can rest color medicine helped you in your quest for a full spectrum.  

If you'd like a chance to win a Paint Chip Pal for your very own, visit my Rainbow-Tastic Holiday Blog Hop Post.  You'll find out more about these little guys, their creators and can visit more color inspiring posts by other artisans.


Wednesday, October 10, 2012

Purple Glitter in My Paper Cut, Thanks Justin Bieber!

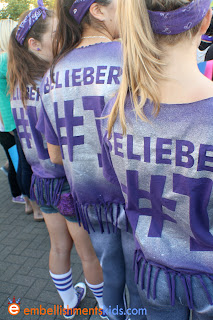
Over the years, my kids have become numb to the weird and wondrous stuff that leaves my studio.  They know, with a little smile and a hug, that I'll turn the studio upside down to create whatever their aspiring art director hearts desire.  Sucker!  Well, the prince of pop, Justin Bieber was coming to town and my daughter's studio wish list was submitted for my consideration.  "Oh, Dad...I don't want to ask for too much, but do you think you can make me a T-shirt and a sign?," she asked with a smile.  "I promised my friends you would make them some too!," she slipped in at the end.  Sucker!


justin bieber shirt
Cut up t-shirts
What's a dad to do?  Get busy of course!  For the t-shirts we cut up the lower part of Bieber purple t-shirts and knotted them to create a fringed look.  I had recently acquired a Silhouette cutting system, so I thought I'd put it to task cutting out her text of choice to use as a reversed stencil, which was Belieber #1.   Placing the stencil on the shirt acts as a mask for the fabric spray paint.


With a few coats of Simply Spray's stencil spray, the purple was covered.  Peeling the stencil revealed the purple shirt color underneath.


She wanted signs to catch the attention of the local radio station, who was giving away seat upgrades.  If she and her two friends each had a part of the sign then for sure they'd upgrade all three of their tickets.

For the signs, I cut out the stations logo in black foam core in two sizes.  One was covered with glue and glittered black and silver.  The other was coated in purple.  Sandwiched in between the layers, I duct taped little battery operated LED lights.  Her favorite part was using two print outs of Mr. Bieber's face as the centers of the zeros.


Decked out in their Bieber wares, holding their flashy signs did the trick!  They caught the attention of the pop star reviewing the crowd from above.

Justin Bieber gives the girls two thumbs up.

As for the seat upgrades, well... the radio station was only upgrading tickets from the upper levels to the floor, which they already had.   Oh well... they we're rewarded by catching his attention and receiving the two thumbs up from the purple pop star.

 She and her friends had a great time.   Which makes it all worthwhile.  Now, if only I could get the purple super fans to help clean up the whirlwind of glitter that's everywhere in the studio and wedged in the "blood, sweat and tears" paper cut I gave myself wrestling the lights onto the foam core.

Thank you Justin Bieber for the opportunity to bond with my girl, her friends and sport bits of purple glitter.  I guess if you can be the purple pop-star, I can be the purple glittered craft dad.

What kind of extraordinary crafty things have you created to make your kids happy?


Thursday, September 13, 2012

Render a Gender- Designing a Neutral Nursery for Baby

 There's a segment of the population that want their baby's gender to be a surprise until birth.  If completing the newborn's nursery ahead of time is a priority, then for sure the term gender neutral comes up.  Oh, but how I wish we could adopt a term other than gender neutral to describe that desire.  Gender neutral sounds like a physical impairment or a sarcastic answer to a Match.com dating preference question.  Regardless, whether they are inny-outty-unsure, seat up or seat down undecided or reproductive representation reserved, those choosing to wait on their baby's sex have decor decisions to make in their nursery.

From all angles in my work as a kids designer and artist creating art and products for the retail marketplace the trend of color is being shouted from the mountain tops.  How's color a trend you may ask?  Well, the trend nerds who spend their every waking hour looking for hints on how to forecast consumer's buying habits all look into 2013 and beyond as years of saturated color.  They are proclaiming the full spectrum of rainbow colored hues IS the new black.   They say it has a causality relationship between our rebounding economy and the need to feel optimistic, re-energized and alive!  Alive with color....say it with me....ALIVE WITH COLOR!  Extra points for your jazz hands and open mouth smiles, well done reader, well done!

This gotta-have color trend relates back to my topic of gender neutral, because basically, I'm not a big fan of mousey mint and rubber duck yellow.  Those official colors of nursery neutrality are tired and thankfully my most recent nursery client agreed.  When I brought up the topic of color, in our initial client meeting, I met no resistance to pushing the color palette into the super saturated one.

zebra nursery


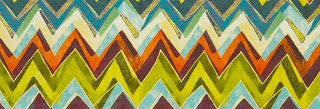
My client was ever so happy to put faith in my decisions and abilities.  She used the magic words "I trust you!"  So off I went shopping for fabrics and all that might inspire a color rich room while trying to remain neutral to gender or, P or V identification procrastination.   Having hit every fabric resource in town with my faithful designer counterpart Shannon Ponciano, whom was designing the rest of the clients home, we came upon a terrific abstractive chevron fabric.  It was color rich, fun yet sophisticated.


This fabric choice led me to my fellow children's artist Melanie Mikecz's wall art entitled the Rainbow Zebra.  What a beautiful mix of happy colors, a fun subject and textures I am so drawn to.  I was delighted to frame the piece with a custom frame, made here in the studio.

rainbow zebra art


From there the room's design rapidly came into fruition.  I planned on saturating the walls with a deep teal, adding a vanilla framed color block of green on the ceiling and furnishing the room with blasts of color and the neutrals grey and white.

gender neutral nursery

Throughout the home's interior, rustic woods are being used in modern ways, so I designed corner shelves for the nursery and constructed them out of 50 year old reclaimed barn wood topped with an acrylic polyurethane finish and lined with burnt orange paint.

gender neutral nursery mobile

For those of you that know me, you are aware of my love for building and creating unique items for my kid's spaces.  I drew up several ideas for a crib mobile and was ready to build my favorite until I came across a terrific DIY, by Jaime over at Sew She Sew's.  Her mobile design was an amazing mix of homespun ingenuity and artful elegance.  I couldn't imagine a better fit for the nursery.

Having solved the mobile dilemma my attention turned to props and accessories.  I created a custom alphabet piece, a vintage wood mirror and a cute green chalkboard to compliment the grouping anchored by a 30 inch tall giraffe sculpture.

gender neutral nursery giraffe art collage

A Red Ryder wagon entered my studio brand new, out of the box, and left a distressed and faux antiqued piece ready to act as a bookshelf along the room's bank of windows.
Inspired by the crib fabric I chose to render one wall with a series of elongated zig zags inviting more color into the room.

gender neutral mural colors

Once baby arrives the room can evolve to impart a more feminine or masculine attitude.  Of course that depends on their little one either having a wee wee or a she wee!  Yep, after that, I'm fresh out of gender neutral terms.

I have an extremely happy client, I've made the hidden from sunlight trend seekers proud and most of all had a lot of fun.  I did however piss off all of those mint and yellow fans.  Oh, well....sorry, I'll repay you in 20 years when the whole southwestern pastel aztec trend reemerges like a zombie.  Aaaaaahhhhh!

Best,
Aaron


This nursery is featured until September 23rd in an open home tour, in Vancouver Washington.  The homeowners are opening their newly completed home to visitors as part of the Clark County Parade of Homes.  If you're in town, I'd love to have you drop by and check it out.

Of course, I'd love to hear your comments here or you can join me on my Facebook page, where I'll share a few more details.  For you Pinning Peeps I've loaded up the collection of photos on a Pinterest board for you to share.

Tuesday, July 10, 2012

Up Cycled Menagerie - DIY Faux Animal Taxidermy from Recyclables


DIY Taxidermy Craft from Recyclables by Aaron Christensen
Be sure to check out the contest at the end of this post, ending Friday the 20th.  Comment to Win your favorite of the three animals shown here in the post.  


Take a long hard look in your recycling bin.  It's crawling with creatures great and small.  Hopefully, not real ones, but fun future faux ones.  With a little imagination, and some easy DIY instructions, you can create a zoo of animals out of common recyclables.

Welcome to my latest craft DIY brought to you by my friends at Rosenberry Rooms Very Rosenberry Blog.

Common recyclables like laundry detergent bottles, toilet tissue rolls
yogurt cups, styrofoam meat packing trays and cardboard are great components
for your own faux taxidermy.
When I design kid's spaces, for my clients, I want them to be filled with personality and some of their child's own handy work.  Often, I'll lead them in a craft project to create something unique.  These friendly taxidermy mounts would be a great project for them and would make wonderful room decor.  They would also be fun school auction projects or a DIY craft for parties.  The possibilities are only limited by your imagination.  You can follow along to make your own deer, rhino or circus giraffe version or experiment with the items in your recycling bin to create your own.

Two folded sour cream container lids make perfect ears.


upcycled recyclables crafted into a faux taxidermy giraffe DIY by Aaron Christensen
A whimsical circus giraffe can be crafted by creating a hat from a disposable
drinking cup, some chenille pipe cleaners and a few feathers.

upcycled recyclables crafted into a faux taxidermy rhino DIY by Aaron Christensen
By cutting the handle off of a bleach bottle and taping it to the spout
you have a fun filled rhino.


Getting started....

1)  Assemble your recyclables and decide upon the type of animal you want to create.  Remember, the materials can be cut, moved, folded and altered with tape, cardboard or things like bottle caps, straws and craft supplies.

2)  Using scissors or a blade knife, cut or trim your recyclables into the shapes and dimensions you need.  Also consider scoring and folding pieces to create new shapes. Always observe safety precautions when using tools.

3) Utilize masking tape and hot glue to assemble your creation.  Masking tape can be used to bridge voids, cover seams and close open ends.

Folding sour cream lids over and gluing them into a hole creates
ears perfect for a deer.  The handle of the bottle was covered with masking
tape.

With plastic spoons for tufts and folded tissue rolls for ears, the circus
giraffe takes shape.

The rhino's ears are corners off of a styrofoam meat packing
tray.  His horn is a cut and turned around handle from the bleach bottle.


4) Decide upon the type of mount you'd like to use.  Here I've provided three shapes to download.  You may have to adjust your printer settings to a size greater than 100% to create large ones.


 5)  Cut two copies of your mount out of cardboard.  Also cut enough inch or two inch strips to line the outside.  Pre-creasing or shaping the strips will make it easier to follow curves.


6) Using hot glue, attach the pre-creased shapes to follow the outside edge of your mount.  Let it cool.


7) Cut two triangles into your matching back piece.  Locate them towards the top.  These triangles will be the points in which you hang the piece from nails or screws.  Using hot glue, secure the back piece on.

8) Hot glue and/or tape your animal to the mount.

Paper Mache over your sculpture.

9)  Mix water, flour and a pinch of salt into a paste.  Dip scrap paper, newspaper or tissue into the paste and paper mache the outside of your animal shape.  The more layers you apply the stronger your piece will become.  Although the salt inhibits mold growth, you'll want to make sure your piece dries thoroughly before painting.

10)  Paint and decorate your piece.  Consider painting it in a solid fun color, decoupaging it with images and text or painting it like the original animal.

Your sculpture can be inspired by a jungle, farm, forest or sea.  There are unlimited animal combinations.  Or for something different you can consider making robots, friendly monsters or mythological creatures like unicorns and dragons.

Are there animals in your recycling bin?  You better find them before your trash service hauls away your craft supplies.  If they've already recycled your supplies, you can skip the craft and enter to win YOUR choice of the three pieces I created, the details are below.

Have fun!
Aaron


As a bonus for dropping by, my readers and those visiting from Rosenberry Room's Very Rosenberry blog can enter to win the featured menagerie animal mount of your choice.  One winner will be chosen to select either the deer, rhino or circus giraffe, as my gift.  Here's how to win....

Leave me a comment here letting me know how you follow me?  Twitter, Pinterest, Facebook or Email...that's it.  Of course you could chat longer if you'd like.  I'd love to hear from you.


To follow me by email:  Enter your email address in the "Keep up with my mayhem" email subscription box in the upper right corner. 

To follow by Pinterest:  Visit my Pinterest page and click "Follow".

To follow by Twitter:  Visit my Twitter page and click "Follow".

To follow by Facebook: Visit my Facebook page and click "like".

The winner will be selected on July 20th.  Open to continental US residents only.


Monday, July 9, 2012

Up-cycled Menagerie- DIY Recycle Crafts and Ideas for Kids

Do you have animals in your recycling bin?  I bet you do, you just have to put them together.

Join me tomorrow, guest blogging at Rosenberry Room's - Very Rosenberry Blog.  I'll help you take everyday recyclables and turn them into a menagerie of whimsical animal mounts.  This craft idea is a great summer's day project for the kids or during the school year, they'd be fun auction projects.


Can you see the animals?  They're there to be discovered in tomorrows craft idea.


Friday, January 27, 2012

Alright Sports Fans! DIY- Do It Yourself Vintage Sports Jersey Chalkboard


chalkboard, DIY chalkboard, sports, decor, jersey, by Aaron Christensen


Here's a DIY I created for sports enthusiasts.  It's perfect for a boy's room or a man cave.  Whether it hosts your favorite teams game schedule, a fan showing of school colors or a personalized homage to your son's player number, my easy to create jersey chalkboard is a great addition to any sports bedroom. It can be customized to support your favorite sport and team colors. This project includes a recipe to create your own customized chalkboard paint. Combine this unique piece with my vintage sports art and you're set to reign as a champion sports room designer. 

Be sure to fan, favorite or follow me for more DIY's and get exclusive access to my forthcoming ebooks.

Go Team!
-Aaron


MATERIALS:

- 24 inch x 24 inch 1/2 MDF Board
- 2 cups of flat finish or matte latex paint in your choice of color
- Additional latex or craft paint for decorative stripes and accents
- 4 tablespoons of un-sanded tile grout
- 8 oz. of Dark Brown craft paint
- Mixing Container
- Disposable small roller/tray kit
- Paint brush
- Masking tape
- Optional spray adhesive
- One 80 or rough grit sanding sponge or sheet paper
- One 150 or fine grit sanding sponge or sheet paper
- Sawtooth hanger or picture frame hanging wire kit

TOOLS:

- Jig Saw with Smooth finish blade
- Protective Goggles
This craft requires the use of power tools. Please read and observe the safety instructions provided with your tool. Always wear safety gear.


INSTRUCTIONS:

1. Determine your color palette and accent designs for the jersey. Remember that chalk is only available in lighter colors so your jersey should be a darker color. The jersey can be tailored to your favorite sport by changing the accents, stripes or details. Utilizing stencils you could also add text or numbers.


2. Download the jersey template from Jersey Project Template or http://www.embellishmentsstudio.com/embellishmentskids/JersOutAChristensen.pdf

3.Match up the nine template pieces to assemble the image and tape it together. Either cut the template out and trace the image onto the MDF board or spray the back of the template with a light coat of spray adhesive and adhere to the MDF board.

4.Wearing goggles, use the Jig Saw to cut out the traced or adhered jersey image. Lightly sand the edges with 150 grit sandpaper or a sanding sponge.


5.In your choice of color, paint the outside edge of the jersey. Two coats may be necessary. Mix 4 tablespoons of un-sanded grout with the remaining paint, being sure to smooth out any clumps. Apply multiple coats of the grout/paint mix to the jersey using a disposable roller kit. Allow the coats to dry between layers.


6.Once dry, using a combination of masking tape and accent colors, apply your choice of stripes or decorative details to the jersey. Allow to dry overnight.


7.First using the 80 grit sandpaper or sponge, sand the edges of the jersey to distress it and reveal the MDF underneath. You can also sand your painted details back to reveal either the MDF or the base paint underneath. Re-sand those areas and the entire surface with the 150 grit sandpaper/sponge.

8.Dilute some dark brown craft paint with water until it is the consistency of a stain. Dip a rag into the diluted paint and apply to the jersey’s edges or anywhere an antique tone is desired.

9.Allow to dry

10.Mount either a sawtooth hanger or picture hanging wire to the back of the jersey for mounting.

Condition the chalkboard by rubbing the entire surface with chalk. Either leave some chalk residue by lightly erasing the chalk or remove it all with a damp sponge.


Personalize the jersey with numbers, names or personal messages.


Enjoy your project- Aaron


You can also visit my guest post over on Oopsy Daisy's blog for complete DIY instructions.

This project's text, photo's and likeness are copyrighted, please do not repost without permission from me.  Rights are granted for personal use only.  Mass production is prohibited. Copyright 2012 Aaron Christensen